Do you need to use personalization in your campaigns, to reach the recipient?
At Emailcampaigns.eu it’s not rocket science, anyone can do it. You can set it up in just a few clicks.
Before you start setting up your campaign, it’s a good idea to check if you have a first or last name saved for your contacts (at least some of them). If you also have first and last names for your contacts, you can start setting up the personalization. Below is a short procedure:
Open any or new campaigns
Open any campaign concept where you want to set up the personalization. And go to step 2 of the campaign.
Note: Of course, you can also start by creating a new campaign.
Specify the salutation
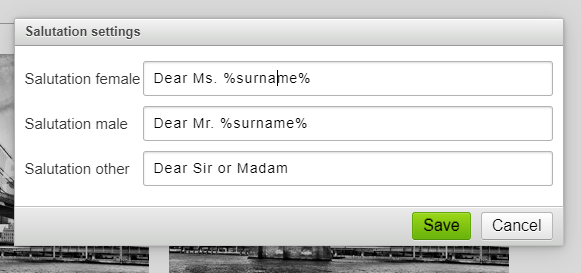
For correct personalization, you need to define separately the personalization of male, female and other contacts for which we do not know the gender. You can define it as follows.
Note: Using wildcard %surname%, the last name of the contact is inserted. You can do the same with first name, where the wildcard %firstname% would be inserted.
Insert the salution into the campaign
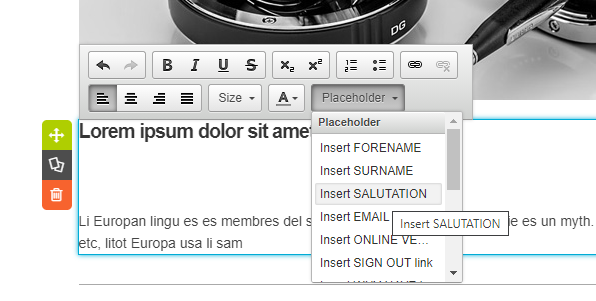
If you’ve already set up your salutation correctly, you now need to insert it into the appropriate place in your campaign. This can be done either manually – by typing the %salutation% wildcard into the place where the personalization should be inserted. Alternatively, use the placeholder button in the menu and the “Insert SALUTATION” option. The wildcard for the salutation (as well as other wildcards) is inserted right in the place of the mouse cursor.
Test it and send it
Everything is now set up. Just save step 2 and finish the campaign. When the campaign is sent out, the system will send a personalized email with the salutation to each saved contact whose gender and last name it knows.
You can also check the personalization rendering in the fourth step of administration via Campaign preview.
Note: If you send a test email in step 4 of the campaign, the %salutation% wildcard will not yet be replaced.


